
Table of Contents
Introduction
I'm going to walk you through creating a WhatsApp chatbot using Dialogflow. I initially wanted to do this in several blog posts but I'm going to cover it all in one. Brace yourself it might be a bit long.
Prerequisites
- Twilio account
- Dialogflow account
- Node Js
- Javascript knowledge
Getting Started
Install the latest stable version of Node Js if you don't have it.
Twilio
Visit twilio and sign up for a new account if you do not have one. You'll be given some credits to get you started. After they are over you'll need to pay to get more so use them wisely.
On your dashboard take note of your Account SID and Auth Token.
Head over to https://www.twilio.com/console/sms/whatsapp/learn and follow the instructions to connect your Whatsapp account to your sandbox. This is necessary for the sandbox environment. This is all you need for now, we'll come back to this later.
Dialogflow
According to their website,
Dialogflow is an end-to-end, build-once deploy-everywhere development suite for creating conversational interfaces for websites, mobile applications, popular messaging platforms, and IoT devices. You can use it to build interfaces (such as chatbots and conversational IVR) that enable natural and rich interactions between your users and your business. Dialogflow Enterprise Edition users have access to Google Cloud Support and a service level agreement (SLA) for production deployments.
We will be using Dialogflow to power our chatbot. Head over to Dialogflow Console and create a new agent. I will not dive into the specifics of creating and training agents, handling entities, intents and more. That is beyond the scope of this tutorial. You can find multiple resources on this online.
After creating your agent, click on the Small Talk tab on the left and enable it. This allows our bot to respond to small talk and common phrases. You can customize the responses on the same tab. You can do this for a more personalized experience. On the right side of your Dialogflow console, there's an input field where you can test out your bot.
When you've tested out your bot and are satisfied you can now follow the steps below to set up authentication for accessing your chatbot via an API.
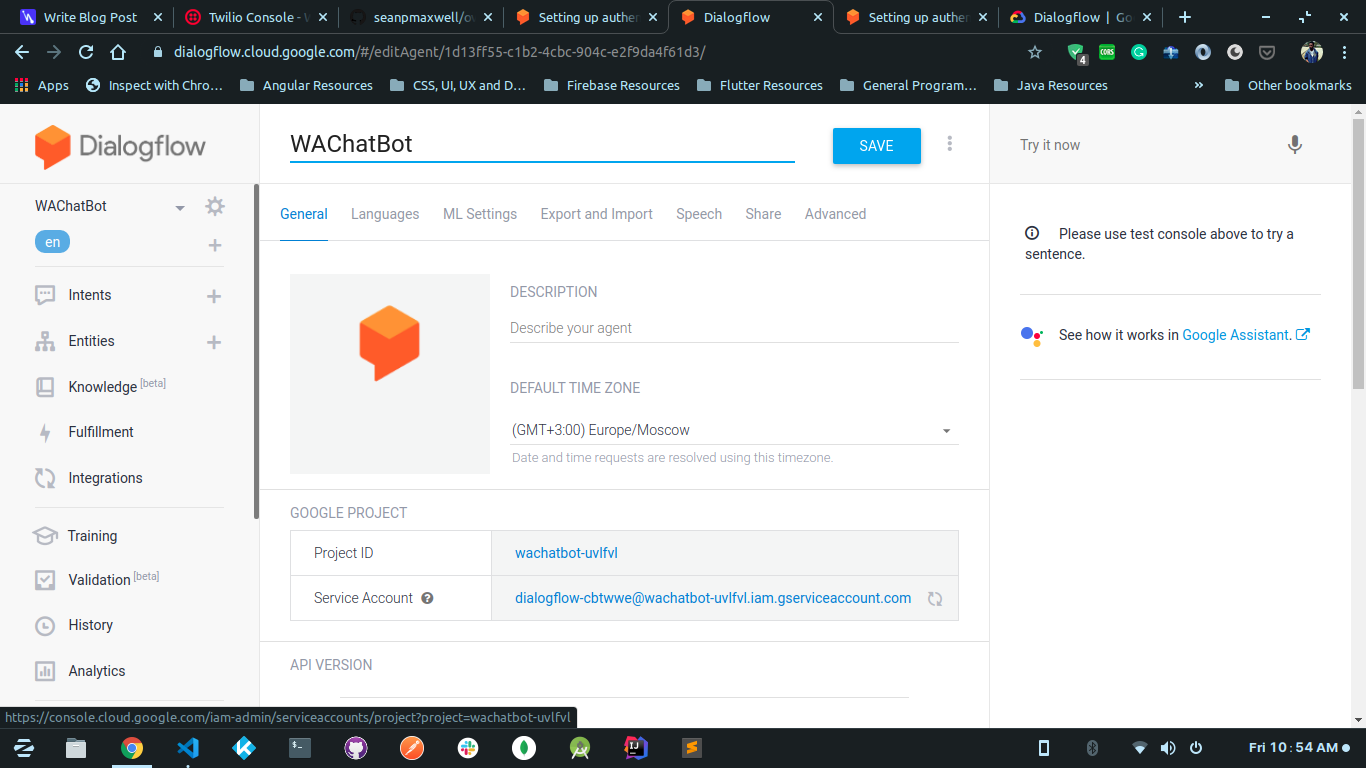
- On your Dialogflow console, open settings by clicking on the gear icon next to our project name.
- Take note of the Project Id that is on the General tab of the settings page under Google Project section. We'll be using that later.
- Follow the link next to Service Account.
- Create a new service account, give it an appropriate name.
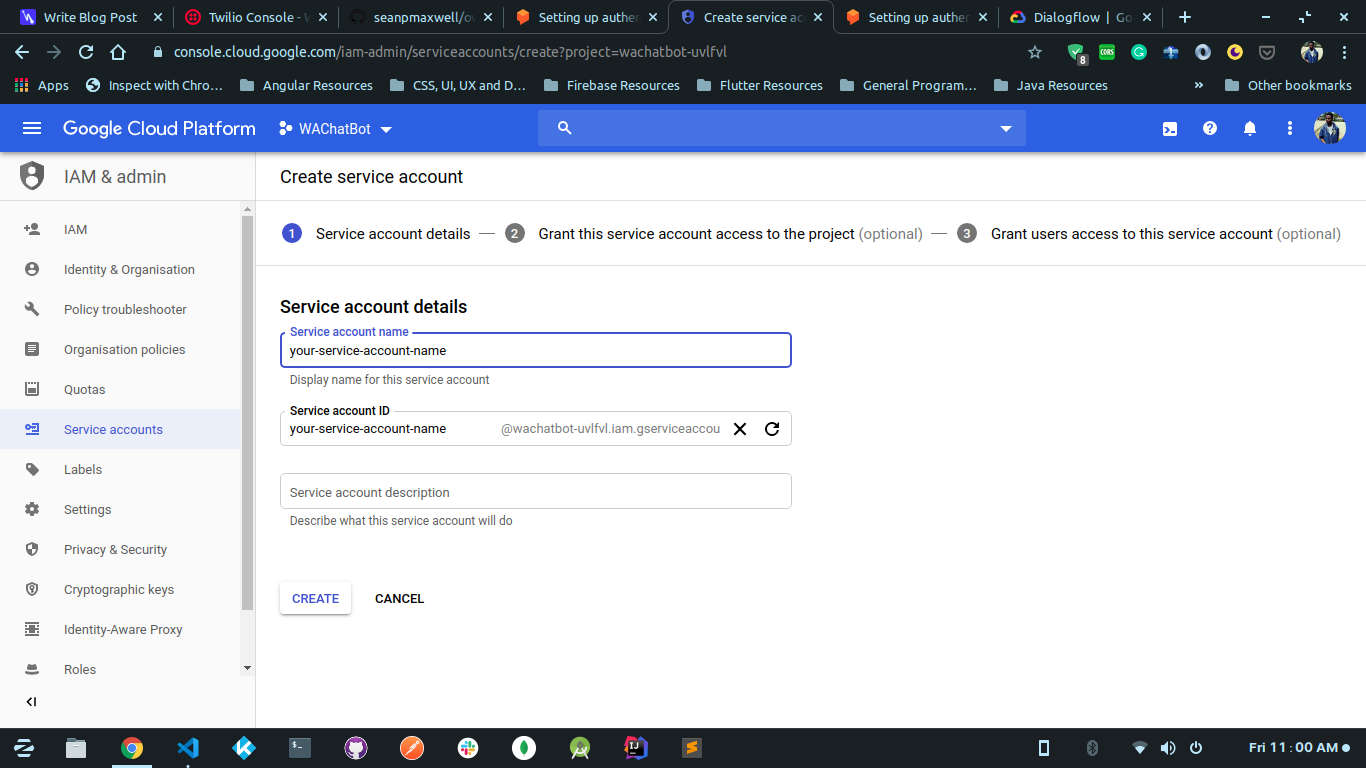
- Set Dialogflow role to Dialogflow API Admin
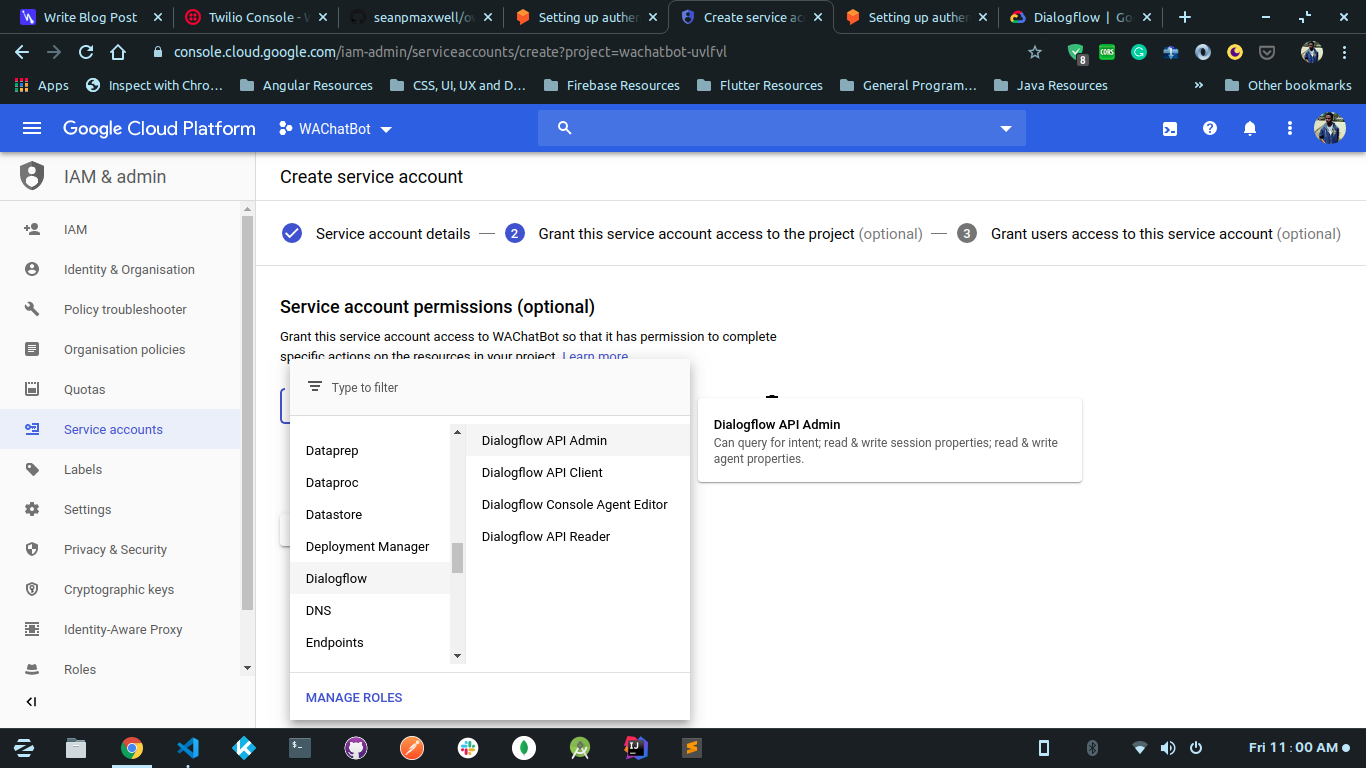
- Create a new key and choose JSON.

- Rename the downloaded JSON file to
credentials.json. This is just so we can reference it easily. We will come back to this file later.
Backend (Node JS)
I will be using typescript in this project. You shouldn't feel intimidated even if you haven't used it before. You can check out this guide on how to get started with typescript and express.
Open your terminal and create a new project.
mkdir wa-chatbot && cd wa-chatbotInitialize a new node js project inside the folder we just created and changed directory into
npm init -yInstall the following dev dependencies
- nodemon
- typescript
- ts-node
- ts-lint
npm i -D nodemon typescript ts-node ts-lintInstall the following dependencies
- express
- dotenv
- twilio
- dialogflow
- @overnightjs/core
- @overnightjs/logger
- body-parser
- cors
We're using Overnight to stay closer to the MVC pattern and utilize Object Oriented style of programming. Read more about Overnight here.
npm i -S express dotenv twilio dialogflow @overnightjs/core @overnightjs/logger body-parser corsWe also need to install types for these modules
npm i -D @types/node @types/express @types/twilio @types/dialogflow @types/body-parser @types/corsNext, we'll create a tsconfig.json file. In the root of your project make a new file.
touch tsconfig.jsonCopy and paste the following content inside the new file
{
  "compilerOptions": {
    "module": "commonjs",
    "strict": true,
    "baseUrl": "./",
    "outDir": "build",
    "removeComments": true,
    "experimentalDecorators": true,
    "target": "es6",
    "emitDecoratorMetadata": true,
    "moduleResolution": "node",
    "importHelpers": true,
    "types": ["node"],
    "typeRoots": ["node_modules/@types"]
  },
  "include": ["./src/**/*.ts"],
  "exclude": ["./src/public/"]
}
I will not go into the specifics for now but you can read typescript documentation for more information.
Next, create a tslint.json file at the root of your project and paste the following content inside.
{
  "defaultSeverity": "warning",
  "extends": ["tslint:recommended"],
  "jsRules": {},
  "rules": {
    "trailing-comma": [false],
    "no-bitwise": false,
    "jsdoc-format": true,
    "deprecation": true,
    "interface-name": true,
    "no-duplicate-imports": true,
    "no-redundant-jsdoc": true,
    "no-use-before-declare": true,
    "variable-name": false,
    "object-literal-sort-keys": false,
    "member-ordering": true,
    "await-promise": true,
    "curly": true,
    "no-async-without-await": true,
    "no-duplicate-variable": true,
    "no-invalid-template-strings": true,
    "no-misused-new": true,
    "no-invalid-this": true,
    "prefer-const": true
  },
  "rulesDirectory": []
}
Let's set up our backend structure. Open your terminal and run the following commands inside the root of your project.
mkdir src && touch src/AppServer.ts && touch src/start.tsAppServer.ts is where we will set up our express app.
Paste the following inside src/AppServer.ts
import * as bodyParser from "body-parser";
import * as controllers from "./controllers";
import { Server } from "@overnightjs/core";
import { Logger } from "@overnightjs/logger";
import * as cors from "cors";
export class AppServer extends Server {
  private readonly SERVER_STARTED = "Server started on port: ";

  constructor() {
    super(true);
    this.app.use(bodyParser.json());
    this.app.use(bodyParser.urlencoded({ extended: true }));
    this.app.use(cors());
    this.setupControllers();
  }

  private setupControllers(): void {
    const ctlrInstances = [];
    for (const name in controllers) {
      if (controllers.hasOwnProperty(name)) {
        const controller = (controllers as any)[name];
        ctlrInstances.push(new controller());
      }
    }
    super.addControllers(ctlrInstances);
  }

  public start(port: number): void {
    this.app.get("*", (req, res) => {
      res.send(this.SERVER_STARTED + port);
    });
    this.app.listen(port, () => {
      Logger.Imp(this.SERVER_STARTED + port);
    });
  }
}
In this file, we set up our AppServer class which extends the Server class from Overnight. In the constructor we initialise the Server class passing true as a parameter. We then head on to configure some middlewares for our app. We might be receiving JSON data in our requests so we use body-parser to ensure it's handled properly.
We then set up our controllers which we will create in a short while. After this, we define the start method which will start up the app on the port passed to it as a parameter
Paste this into src/start.ts. This is the starting point for our application.
import { config } from "dotenv";
config();
import { AppServer } from "./AppServer";

const appServer = new AppServer();
appServer.start(3000);
At the top, we import config from dotenv and call it. We use this to configure our environment variables and load them into process.env. We also initiate a new instance of the server and call the start method passing in a port to use.
At this point, we need to set up our controllers. Create a folder inside src and call it controllers. Inside src/controllers create two files: BotController.ts and index.ts
Inside BotController.ts paste the following code
import { Request, Response } from "express";
import { Controller, Post } from "@overnightjs/core";
import { Logger } from "@overnightjs/logger";

@Controller("api/bot")
export class BotController {

}
You'll notice some weird syntax just before our controller class. That's a decorator. We use it to tell the compiler that our class is a controller. We also pass an argument which is our URL path. With this, we can now make restful requests to [SERVER]:[PORT]/api/bot.
We don't have any routes defined yet. For Twilio, we will only need a POST route. Inside the BotController class add the following code.
@Post()
  private postMessage(request: Request, response: Response) {
    Logger.Info("A post request has been received");
    return response.status(200).json({
      message: "A post request has been received"
    });
  }
You'll notice another decorator which tells our compiler that the method handles POST requests.
In src/controllers/index.ts add the following code. This exports our controllers so that it will be easy to export any future controllers.
export * from "./BotController";The fun stuff
It's time to get to the fun stuff. Let's set up our app to communicate with Twilio and Dialogflow.
Create a folder called utils under src. Inside utils create two files: dialogflow.ts and twilio.ts
Inside Dialogflow.ts:
// dialogflow.ts

const dialogflow = require("dialogflow");
const credentials = require("../../credentials.json");

const sessionClient = new dialogflow.SessionsClient({
  credentials: credentials
});
const projectId: string = process.env.DIALOGFLOW_PROJECT_ID!;

export const runQuery = (query: string, number: string) => {
  return new Promise(async (resolve, reject) => {
    try {
      // A unique identifier for the given session
      //const sessionId = uuid.v4();
      const sessionId = number;
      // Create a new session

      const sessionPath = sessionClient.sessionPath(projectId, sessionId);

      // The text query request.
      const request = {
        session: sessionPath,
        queryInput: {
          text: {
            // The query to send to the dialogflow agent
            text: query,
            // The language used by the client (en-US)
            languageCode: "en-US"
          }
        }
      };

      // Send request and log result
      const responses = await sessionClient.detectIntent(request);

      const result = responses[0].queryResult;

      resolve(result);
    } catch (error) {
      reject(error);
    }
  });
};
Here we're importing Dialogflow and also the credentials.json file we downloaded when setting up our chatbot on Dialogflow. Remember that file? Move it to your project's root folder. We're the setting up a new SessionsClient using the credentials file. In our runQuery function we're taking in a query to send to Dialogflow and also the user's Whatsapp number which we will use to set up a Dialogflow session unique to that user. We then send the query to Dialogflow and return the response.
In twilio.ts add the following code :
import { Twilio } from "twilio";
const accountSid = process.env.TWILIO_ACCOUNT_SID!;
const authToken = process.env.TWILIO_AUTH_TOKEN!;

const client = new Twilio(accountSid, authToken);

export const sendMessage = (to: string, from: string, body: string) => {
  return new Promise((resolve, reject) => {
    client.messages
      .create({
        to,
        from,
        body
      })
      .then(message => {
        resolve(message.sid);
      })
      .catch(error => {
        reject(error);
      });
  });
};
Here we create a new Twilio client and instantiate using our Twilio Account SID and Auth Token. We then call the client.messages.create function which takes in the number of the user, the number sending the message(in this case, the Twilio sandbox number) and also a body. We then return the message Id.
You've probably noticed we've used a few environment variables that we haven't defined yet. In the root of your project create a .env file. Inside paste the following code and make sure to replace placeholders with appropriate values. I asked you to take note of the values required at some point in this tutorial.
TWILIO_ACCOUNT_SID=PLACEHOLDER
TWILIO_AUTH_TOKEN=PLACEHOLDER
DIALOGFLOW_PROJECT_ID=PLACEHOLDER
Go back to BotController.ts and replace the postMessage method with the following code.
@Post()
  private postMessage(request: Request, response: Response) {
    // Here we get the message body, the number to which we're sending the message, and the number sending the message.
    const { Body, To, From } = request.body;

    // Here we're sending the received message to Dialogflow so that it can be identified against an Intent.
    runQuery(Body, From)
      .then((result: any) => {
        // We send the fulfilment text received back to our user via Twilio
        sendMessage(From, To, result.fulfillmentText)
          .then(res => {
            console.log(res);
          })
          .catch(error => {
            console.error("error is ", error);
            Logger.Err(error);
          });
      })
      .catch(error => {
        console.error("error is ", error);
        Logger.Err(error);
      });
    return response.status(200).send("SUCCESS");
  }
Twilio hits this method when it receives a message from Whatsapp. We extract the message body, the sender, and the recipient(in this case, Twilio sandbox number). We then send the received body to Dialogflow and get a fulfilment text. We use the Twilio client we set up earlier to send back the fulfilment text to the user.
Now there's only one more thing left to do. Open up your package.json and replace the scripts with the following
"scripts": {
    "tsc": "tsc",
    "prestart": "npm run build",
    "dev": "ts-node src/start.ts",
    "dev:watch": "nodemon",
    "build": "rm -rf ./build/ && tsc",
    "start": "node build/start.js"
  },
The full file looks this
{
  "name": "wa-chatbot",
  "version": "1.0.0",
  "description": "",
  "main": "build/start",
  "scripts": {
    "tsc": "tsc",
    "prestart": "npm run build",
    "dev": "ts-node src/start.ts",
    "dev:watch": "nodemon",
    "build": "rm -rf ./build/ && tsc",
    "start": "node build/start.js"
  },
  "keywords": [],
  "author": "",
  "license": "ISC",
  "devDependencies": {
    "@types/body-parser": "^1.17.1",
    "@types/cors": "^2.8.6",
    "@types/dialogflow": "^4.0.4",
    "@types/express": "^4.17.2",
    "@types/node": "^13.1.2",
    "@types/twilio": "^2.11.0",
    "nodemon": "^2.0.2",
    "ts-lint": "^4.5.1",
    "ts-node": "^8.5.4",
    "typescript": "^3.7.4"
  },
  "dependencies": {
    "@overnightjs/core": "^1.6.11",
    "@overnightjs/logger": "^1.1.9",
    "body-parser": "^1.19.0",
    "cors": "^2.8.5",
    "dialogflow": "^1.0.0",
    "dotenv": "^8.2.0",
    "express": "^4.17.1",
    "twilio": "^3.39.1"
  }
}
You can run npm install again in case I missed any dependencies. We also need to set up nodemon. Create a nodemon.json in your project's root folder and paste the following inside.
{
  "watch": ["src"],
  "ext": "ts",
  "ignore": ["src/public"],
  "exec": "NODE_ENV=development ts-node src/start.ts"
}
You can now run npm run dev:watch and see if your project runs successfully. Next, we need to expose our local server. Ngrok is one of the best open-source solutions but you can use whatever you prefer.
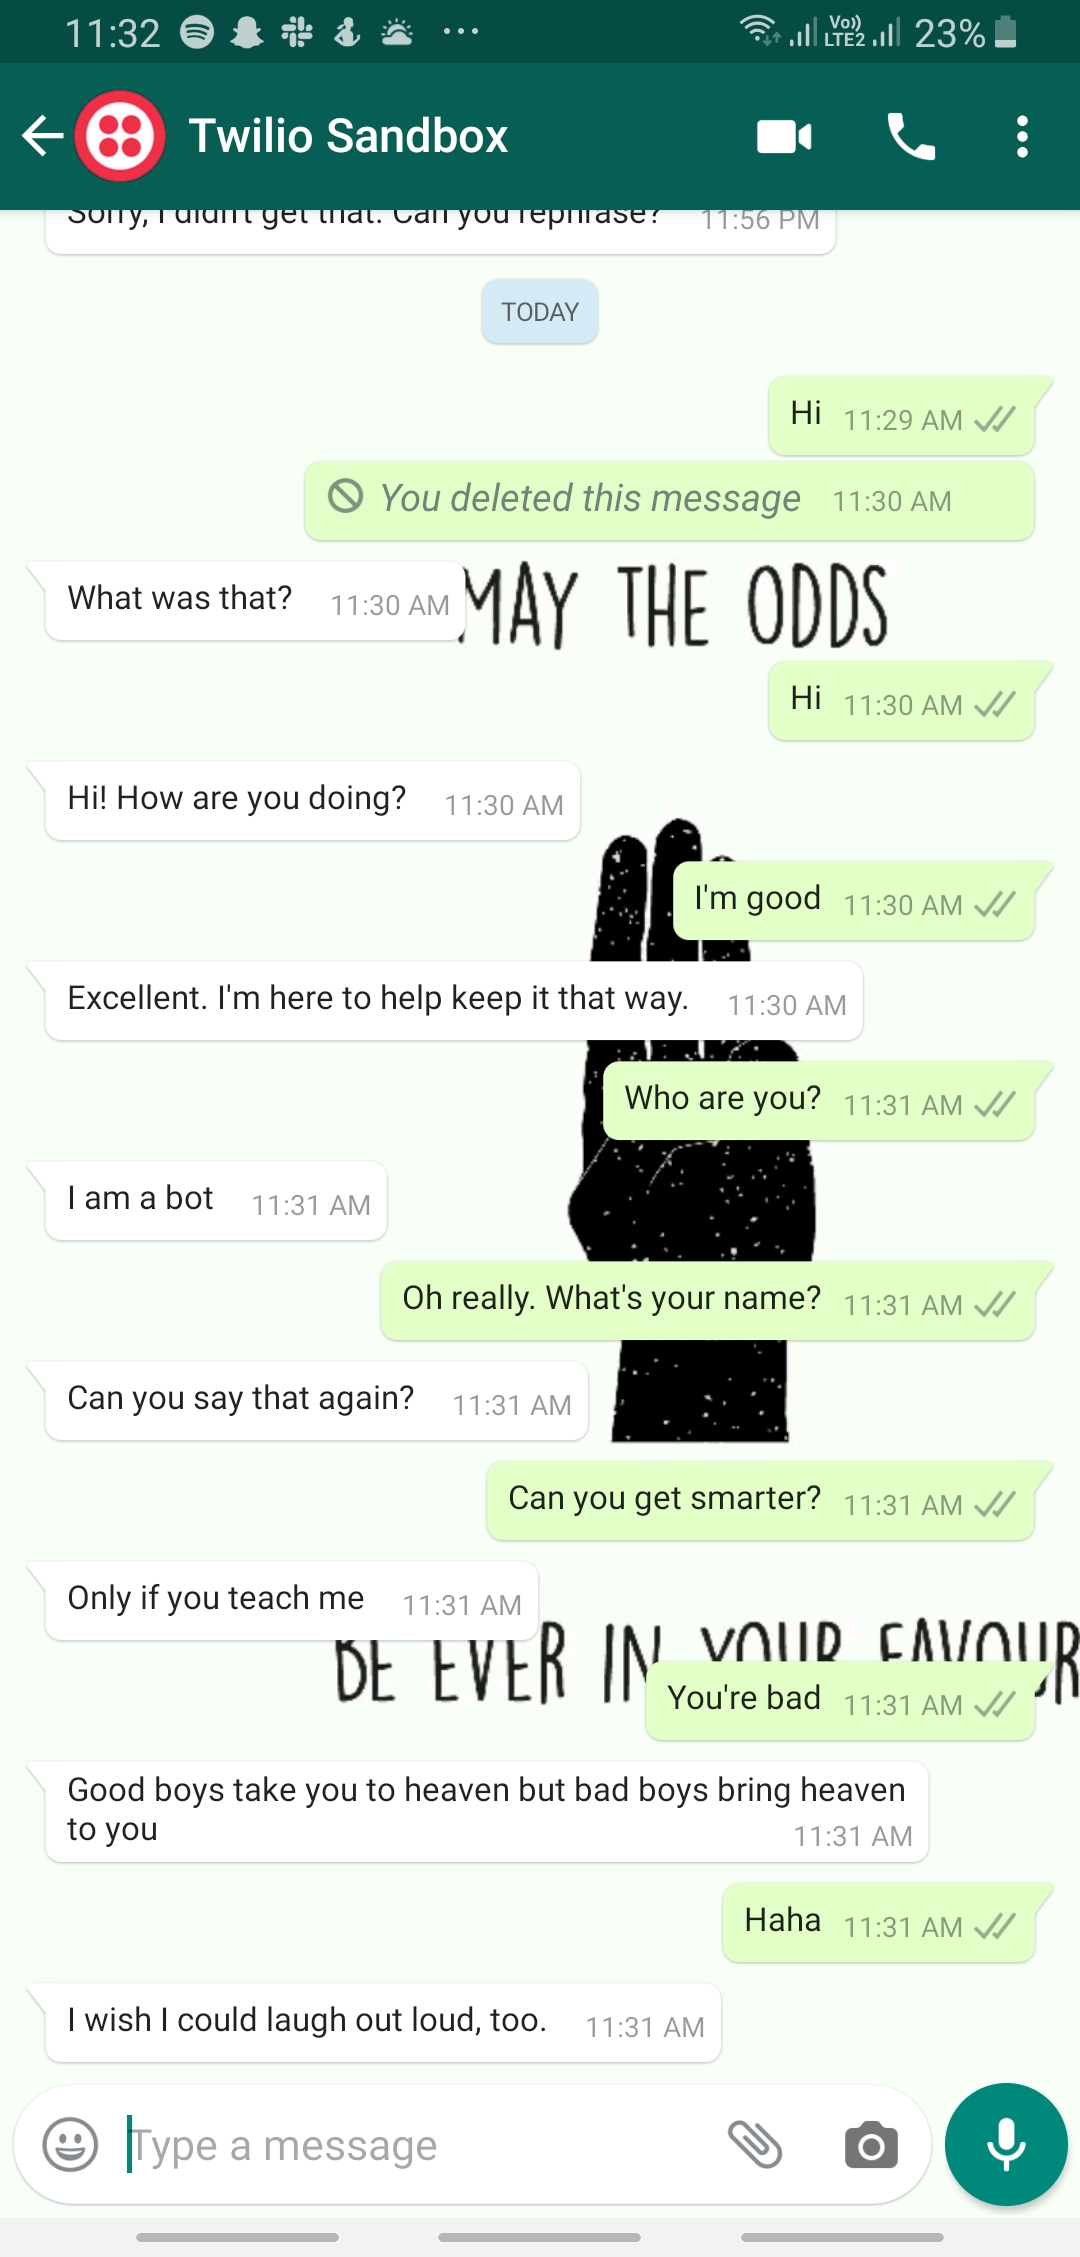
Copy your exposed server URL and open Twilio Whatsapp Sandbox. Replace the URL in WHEN A MESSAGE COMES IN with your exposed URL. Don't forget to add the path to our bot controller. i.e. /api/bot
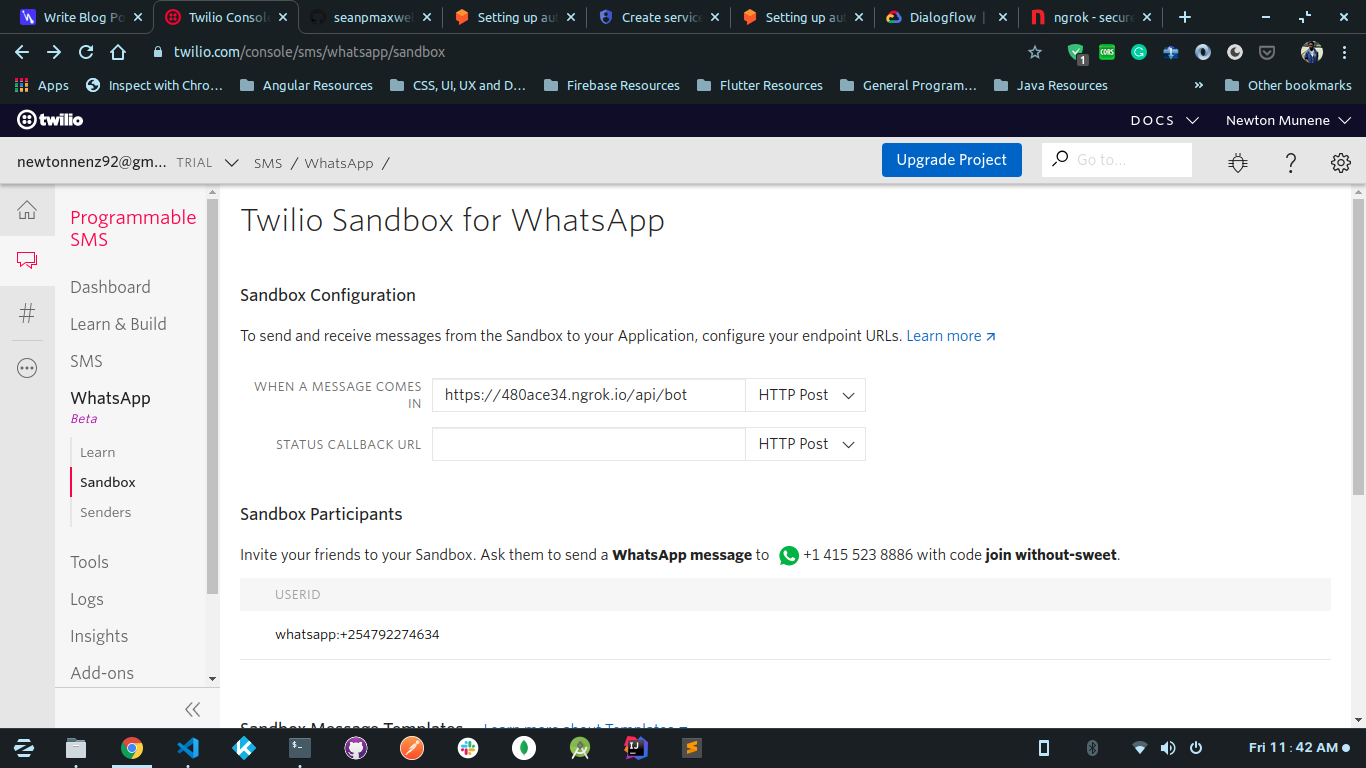 Save the new changes and you can now send a message to the Twilio Sandbox Number and you'll see the response.
Here's some homework for you. Create a new controller to handle POST requests and pass the URL to the STATUS CALLBACK URL input on the Twilio Whatsapp Sandbox. Be creative and be notified when a user reads your message and when it's delivered.
The full source code can be found here https://github.com/newtonmunene99/wa-chatbot