Introduction
If you are looking to get started with flutter, then this here is for you. We'll be creating a hello world app stripped down to the bare minimum. It will most certainly be helpfull if you have some prior programming knowledge,expecially Object Oriented Programming, but is not a requirement.
Prerequisites
- Flutter
- Code Editor. VS Code, IntelliJ or Android Studio recommended.
- Terminal
- Emulator or Physical device for testing.
Head over to Flutter website for instructions on how to install and set up. At the time of writing, I am using Flutter 1.7
Introduction
Flutter is a toolkit/SDK built by Google. It enables developers to build beautiful cross-platform apps in record time. Flutter is driven by dart an OOP programming language also by Google. Dart is fairly easy to learn and we will be looking at advanced concepts later in the series.
Getting started
Once you have Flutter set up open up your terminal and run:
flutter create hello_world
cd hello_world
This will generate a starter project called hello_world and change directory into it. Open your new project in your code editor. I'll be using Visual Studio Code. It has great tooling and is fairly easy to get started with.
Let's go over the project structure and understand what each folder is for.
- android/ and ios/ folders- This is where platform-specific code for android and ios resides. You will barely have to touch these folders
- lib/ - This is where you will be spending most of your time. Most of your code will be written here. Inside you'll find
main.dartthis is the starting point for a dart/flutter app. - test/ - This is where you will write tests for your widgets.
- pubspec.yaml - This is where your app's configuration is. You'll be adding dependencies, assets, fonts etc here.
There are a few more files/folders but we'll be focused on these for now.
Open lib/main.dart in your editor and delete everything inside. We will be writing everything from scratch. In flutter, everything is a widget. The app itself is a widget, the buttons, containers, dialogs, modals are all widgets. There are a few important widgets we need to be familiar with.
MaterialApp- This widget wraps our app and provides functionality common to most apps. In most apps, this will be the root widget. It brings to the table things such as routing, navigation and theming. There's alsoCupertinoAppwhich follows ios styles instead of android.Scaffold- This widget defines a page in our app. It's not necessary to use it to wrap your page but it does bring many benefits. Some of these include modals, dialogs, app bars, navigation bars, snack bars/toasts and so much more.Container- The name is self-explanatory. This widget wraps almost anything. It's one of the most used widgets in flutter.StatelessWidget- This refers to an abstract class which defines widgets that do not have internal mutable state.StatefulWidget- This is also an abstract class which defines widgets that carry mutable state internally.
Read about these widgets and more here.
Paste this code inside lib/main.dart
import 'package:flutter/material.dart';

void main() => runApp(MyApp());

class MyApp extends StatelessWidget {
  @override
  Widget build(BuildContext context) {
    return MaterialApp();
  }
}
At the top, we import material.dart. This gives us access to all the material design widgets. The second line is where our app starts. This is a required function in all dart applications. We tell it to run our app which is a class extending StatelessWidget. Inside our MyApp class, we override the build method of our StatelessWidget class. The build method gets called every time the widget is built. For a stateless widget, this will only happen once. For a stateful widget, it's called every time the internal state of the widget changes.
The build method should always return a widget. Since this is the start of our app we return MaterialApp. Let's add some more configuration here. Replace `MaterialApp`` with the following
MaterialApp(
      title: "Hello World",
      theme: ThemeData(
        primarySwatch: Colors.blue,
      ),
      home: HomePage(),
    );
We've added the title,theme and home properties. title is the label shown over your app when you open the task manager in android. theme takes in ThemeData. We use this to define how our app looks in general. Things like primary and accent colors, toolbar theme, some default text styles, etc. For now we will just set the primarySwatch to blue. You can get different material colors from the Colors class. home defines the starting page for our app.
Let's build out HomePage. Below MyApp class lets create another called HomePage.
class HomePage extends StatelessWidget {
  @override
  Widget build(BuildContext context) {
    return Scaffold(
      appBar: AppBar(
        title: Text("Home"),
      ),
      body: Container(
        child: Center(
          child: Text("Hello World"),
        ),
      ),
    );
  }
}
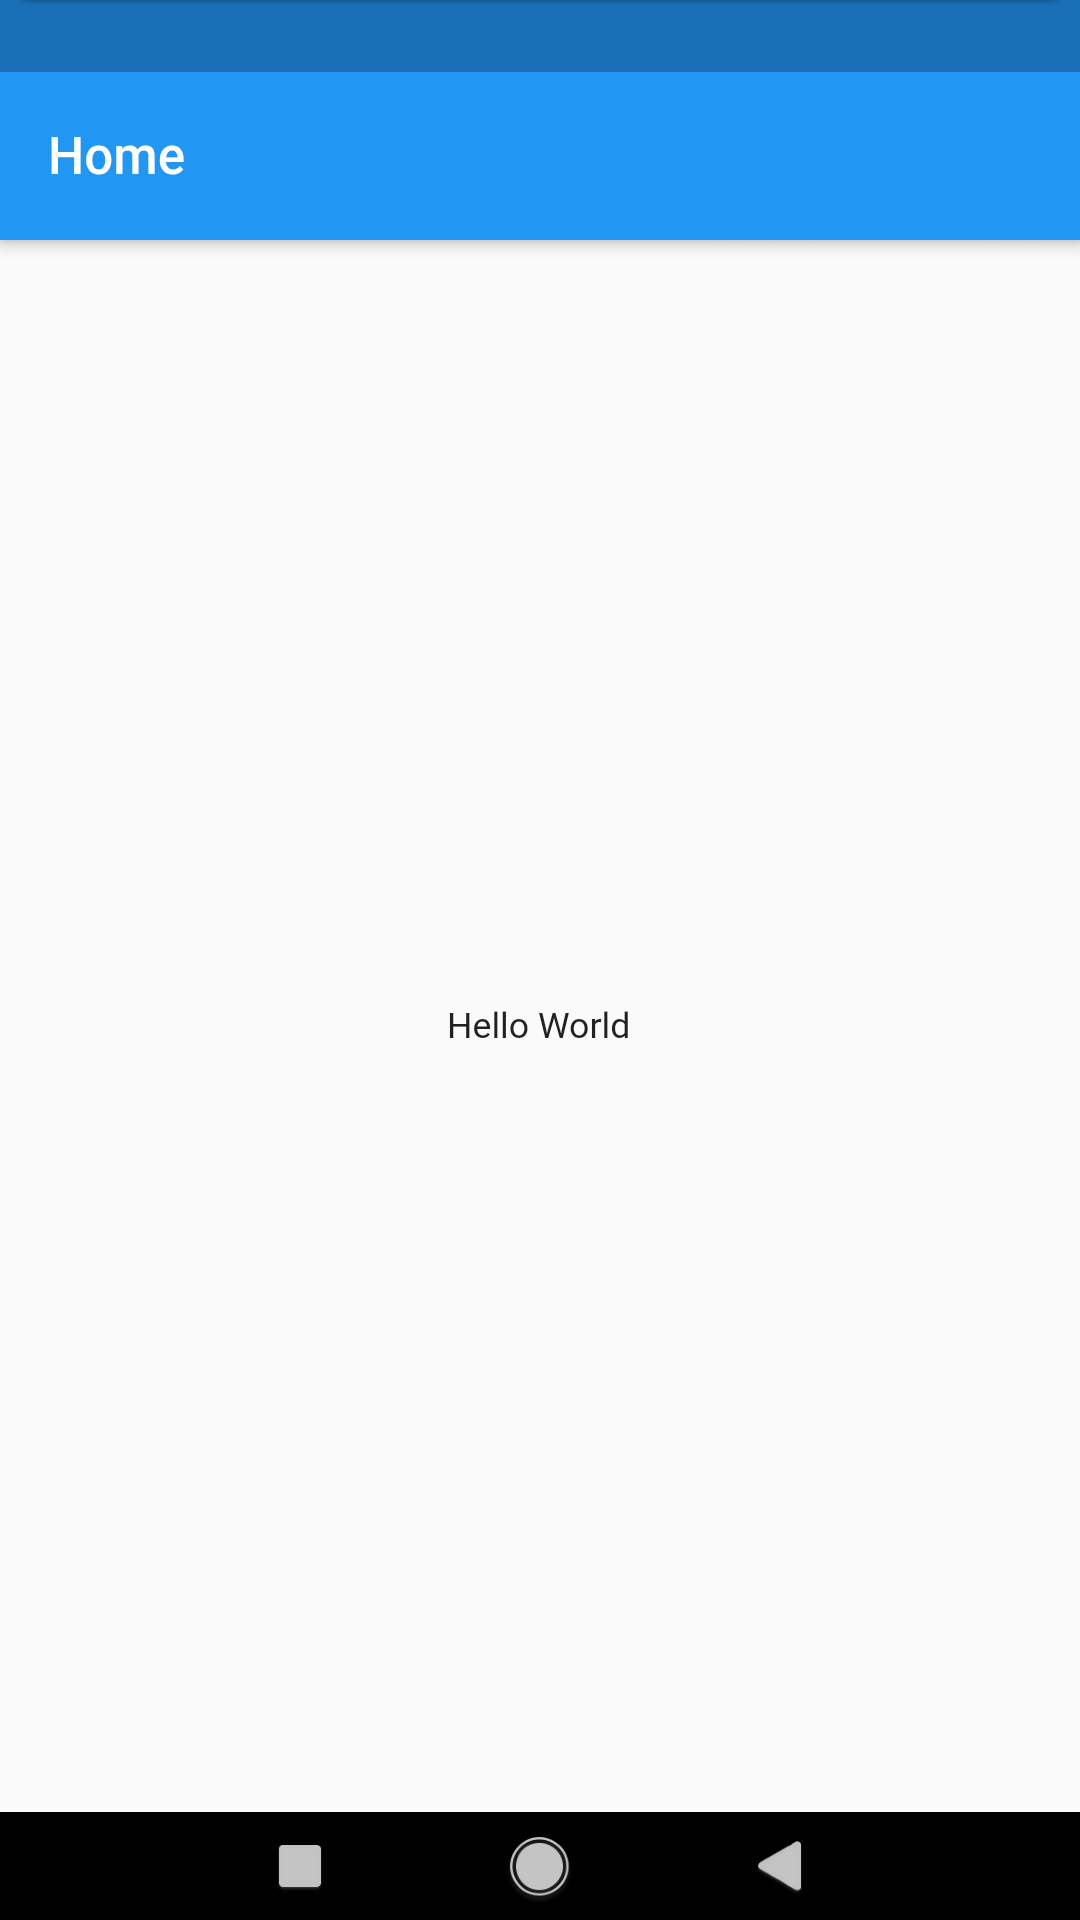
Our build method here returns a Scaffold. A scaffold gives us a standard page look and feel. The app bar takes care of its own styling but at the same time gives you more control over how it should look. We set the title of our page as Home. You can always write some text using the Text widget which takes in a string.
For our page's body, we give it a container which will wrap everything. Its child is a text widget with the words "Hello World". The text is centred by wrapping it in a Center widget. As I said, everything is a widget.
Your final code should look like so:
/// import material.dart
import 'package:flutter/material.dart';

/// starting point of our app. runApp function is a special method from flutter that starts our app
void main() => runApp(MyApp());

/// this is our app's root widget.
class MyApp extends StatelessWidget {
  /// override the build function from `StatelessWidget
  @override
  Widget build(BuildContext context) {
    /// return [MaterialApp] widget
    return MaterialApp(
      title: "Hello World",
      theme: ThemeData(
        primarySwatch: Colors.blue,
      ),
      home: HomePage(),
    );
  }
}

/// This is our home widget
class HomePage extends StatelessWidget {
  @override
  Widget build(BuildContext context) {
    return Scaffold(
      appBar: AppBar(
        title: Text("Home"),
      ),
      body: Container(
        ///Center the text
        child: Center(
          child: Text("Hello World"),
        ),
      ),
    );
  }
}
Ensure you have your emulator running or your physical device plugged in and USB debugging enabled. Run flutter run in your terminal and voila, you have a barebones hello world app.